Weekend Entryway Makeover
A small space with a big impact—discover how I turned my entryway into a calm, functional space that greets you with style.
When I started updating my small entryway, I was amazed at how a few simple changes completely transformed the feel of my home. You don’t need a full remodel to make a big impact—just a little creativity! I began by adding practical storage, like wall-mounted hooks to catch coats and bags the moment we walk in. A fresh coat of light paint (or even a subtle wallpaper) instantly brightened the space and made it feel so much bigger. It’s incredible how these small updates not only made the area more functional but also turned it into a warm, welcoming first impression for everyone who steps through the door.


What You’ll Need
Top board (9/16-in x 3-1/4-in primed pine)
Batten boards (9/16-in x 2-1/4-in primed MDF)
Ledge board (3/8-in x 1-1/2-in trim)
Level or laser level
Tape measure
Miter saw (or hand saw + miter box)
Brad nailer or hammer & nails
Wood filler
Caulk
Paint (primer + top coat)
Create the Look
Here’s exactly how I pulled this look together—step by step! It’s an easy DIY project you can tackle over a weekend.
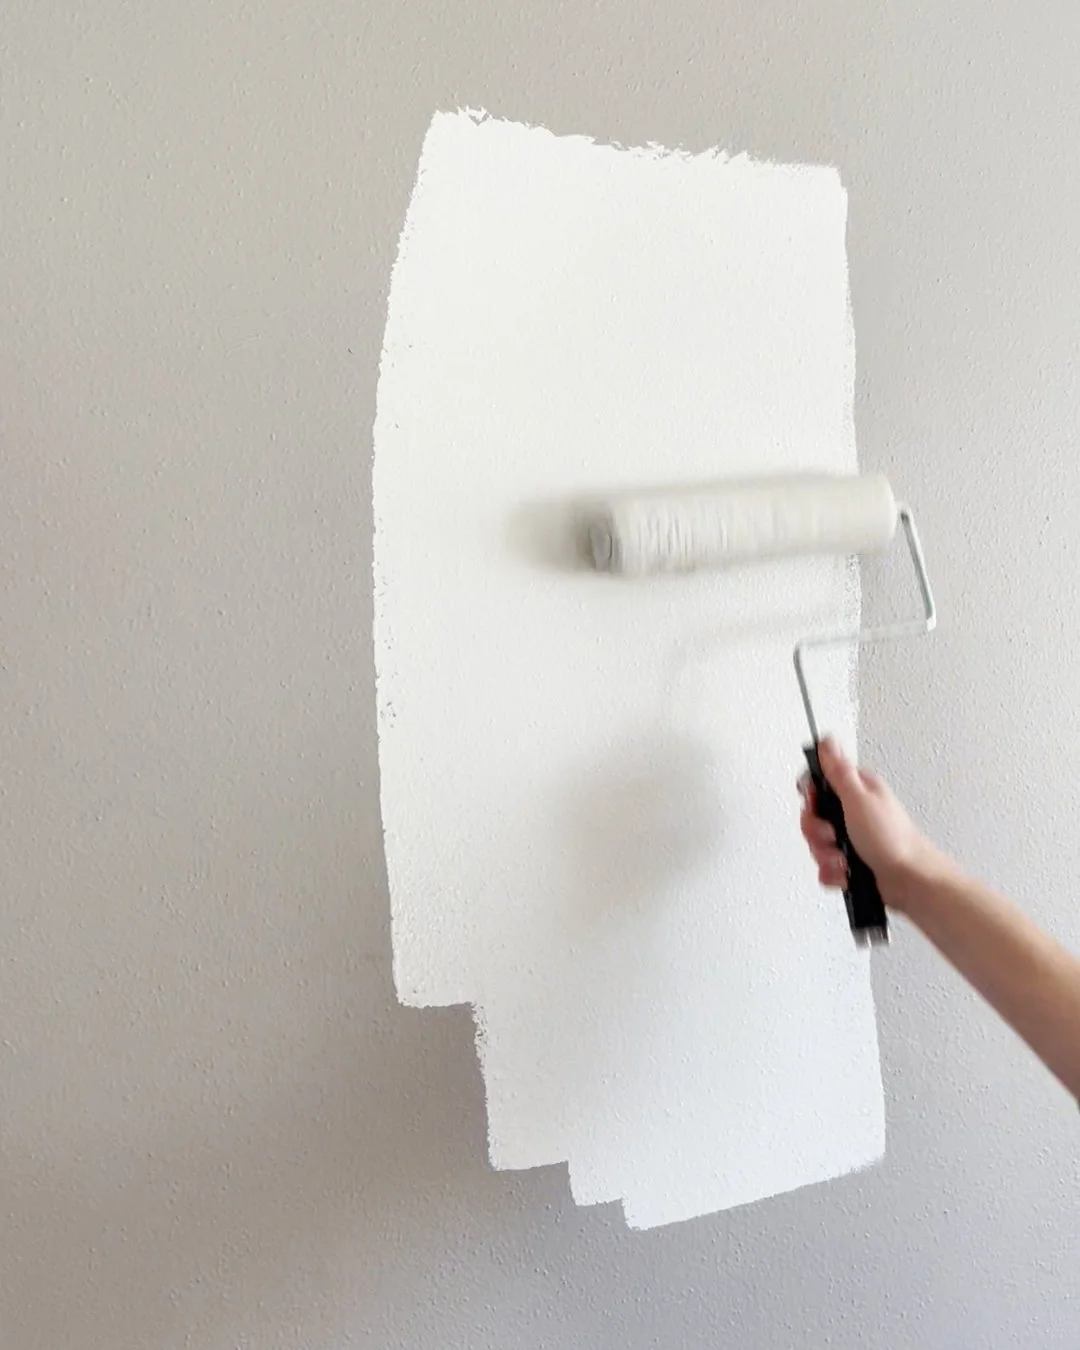
Step 1: Prepare Wall
Remove any baseboards if needed (optional).
Clean the wall — wipe off dust and patch holes.
Paint the wall the bottom color if it will differ from the top section.
The color I chose is Rare and Radiant in eggshell from HGTV HOME by Sherwin-Williams.
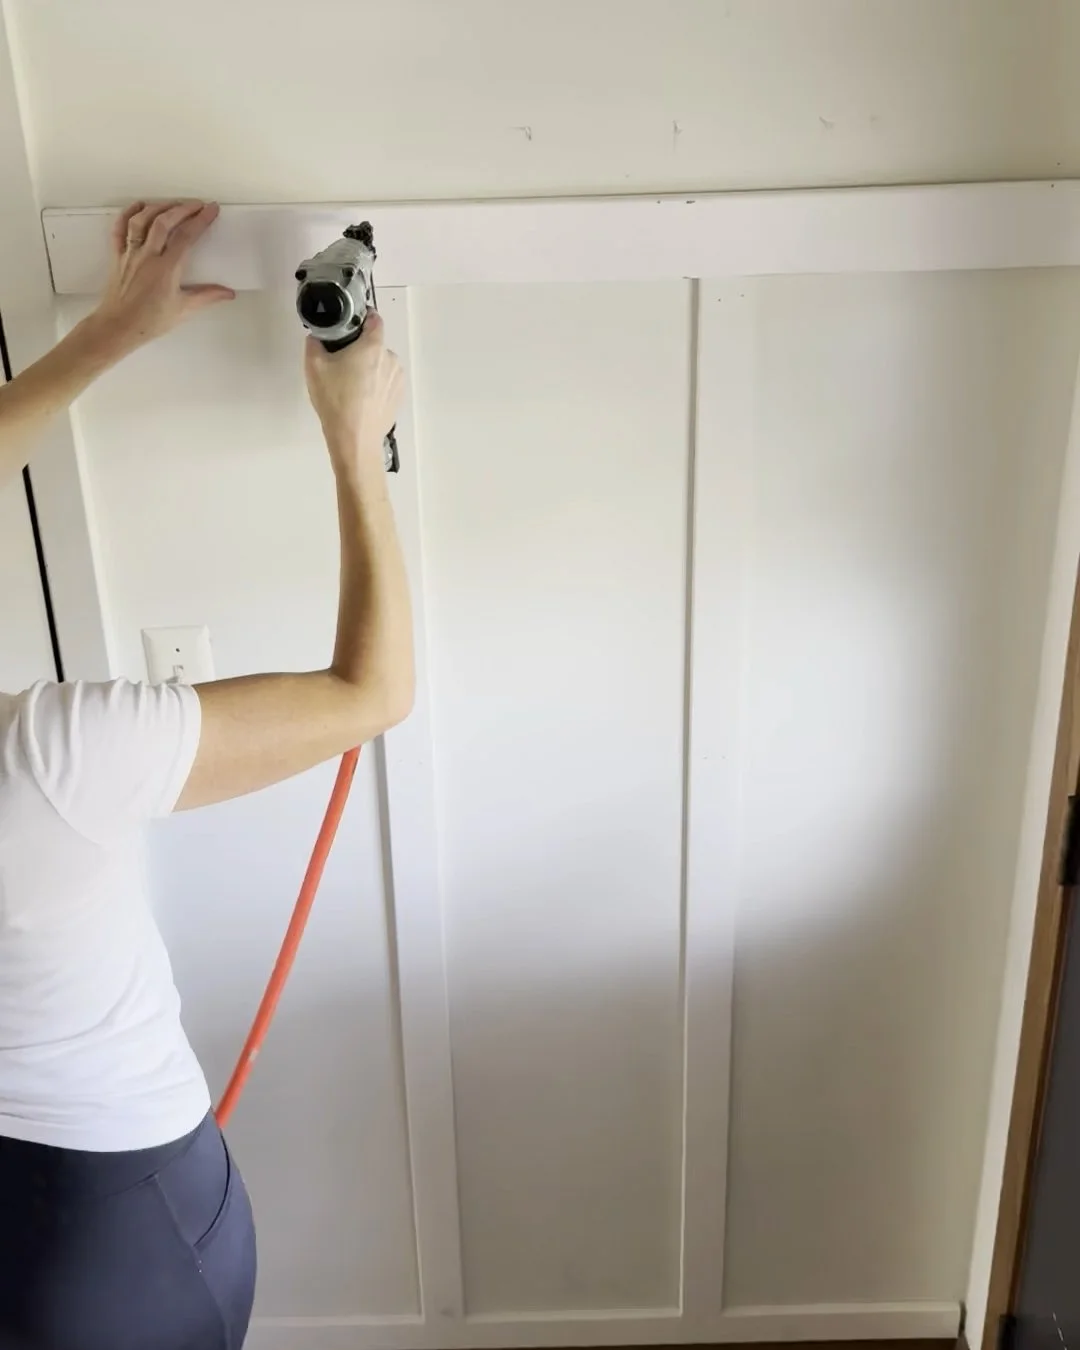
Step 2: Install Boards
Attach top board: Mark the height line with a level (common heights: 3–5 feet). I chose 5 feet. Cut your top horizontal board to size and attach it to the wall with a brad nailer.
Add the baseboard: Keep your existing baseboard or replace it. I usually keep it and add a new board right above the existing trim, forming the bottom edge of the board and batten.
Install vertical battens: Cut battens to fit between the baseboard and top board. Use a spacer (a scrap piece of wood) to keep battens evenly spaced. I chose to space them 11 inches apart.
Optional: I chose to add a small ledge board above the top board.
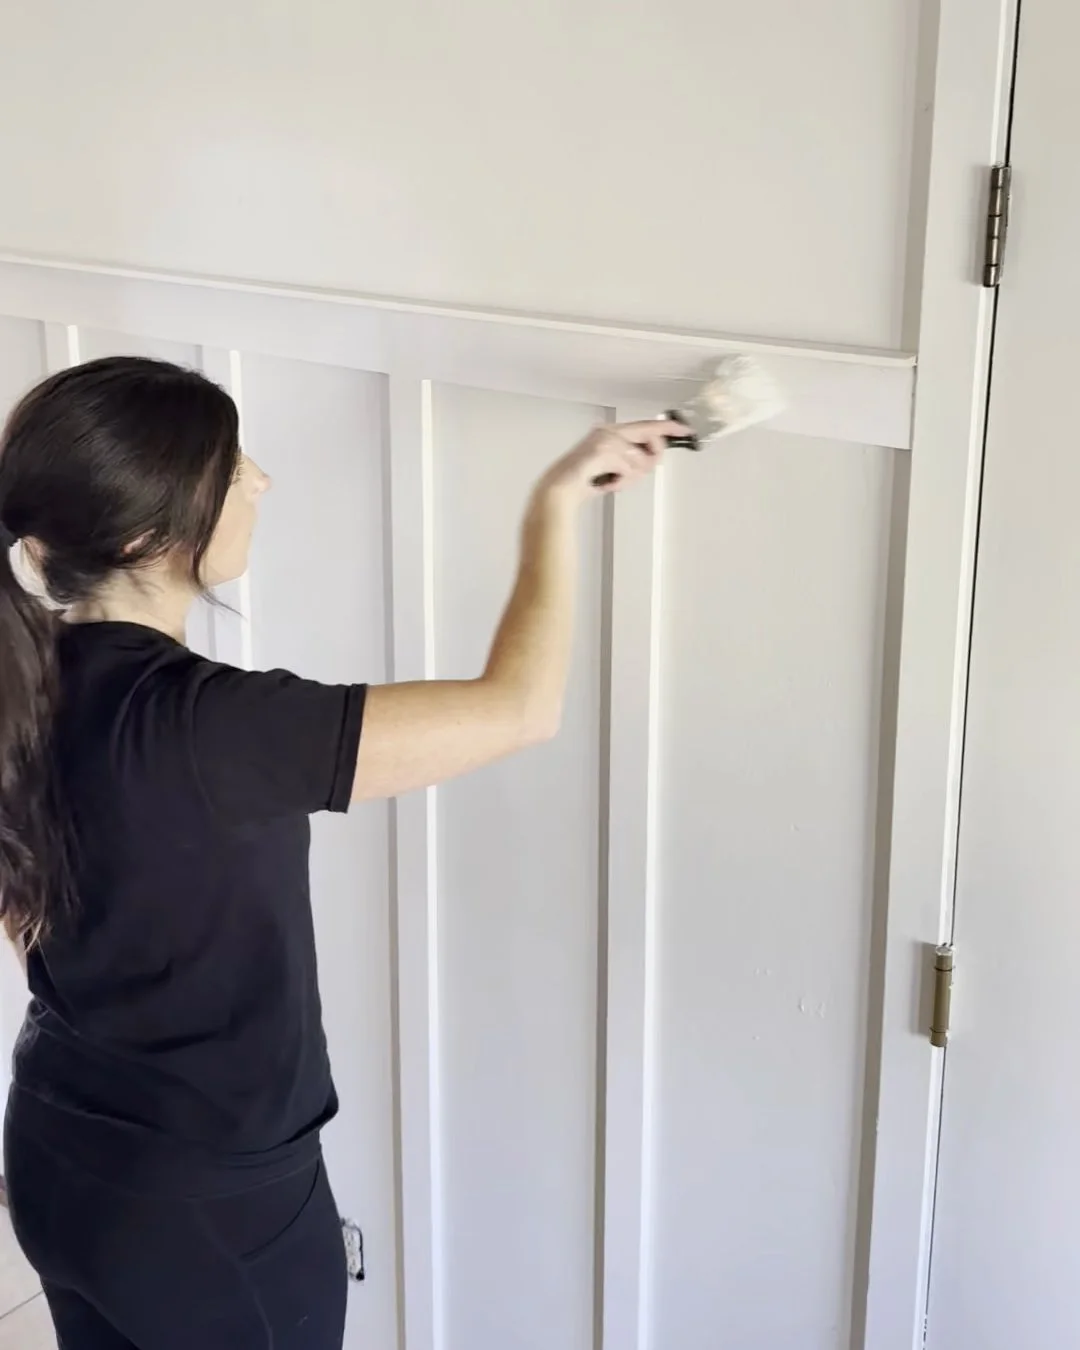
Step 3: Fill, Caulk, and Paint
Fill nail holes with wood filler and let dry.
Lightly sand for a smooth finish.
Caulk all seams where boards meet the wall or each other for a polished look.
Prime if using bare wood.
Paint boards the same color as the wall for a clean, seamless effect.
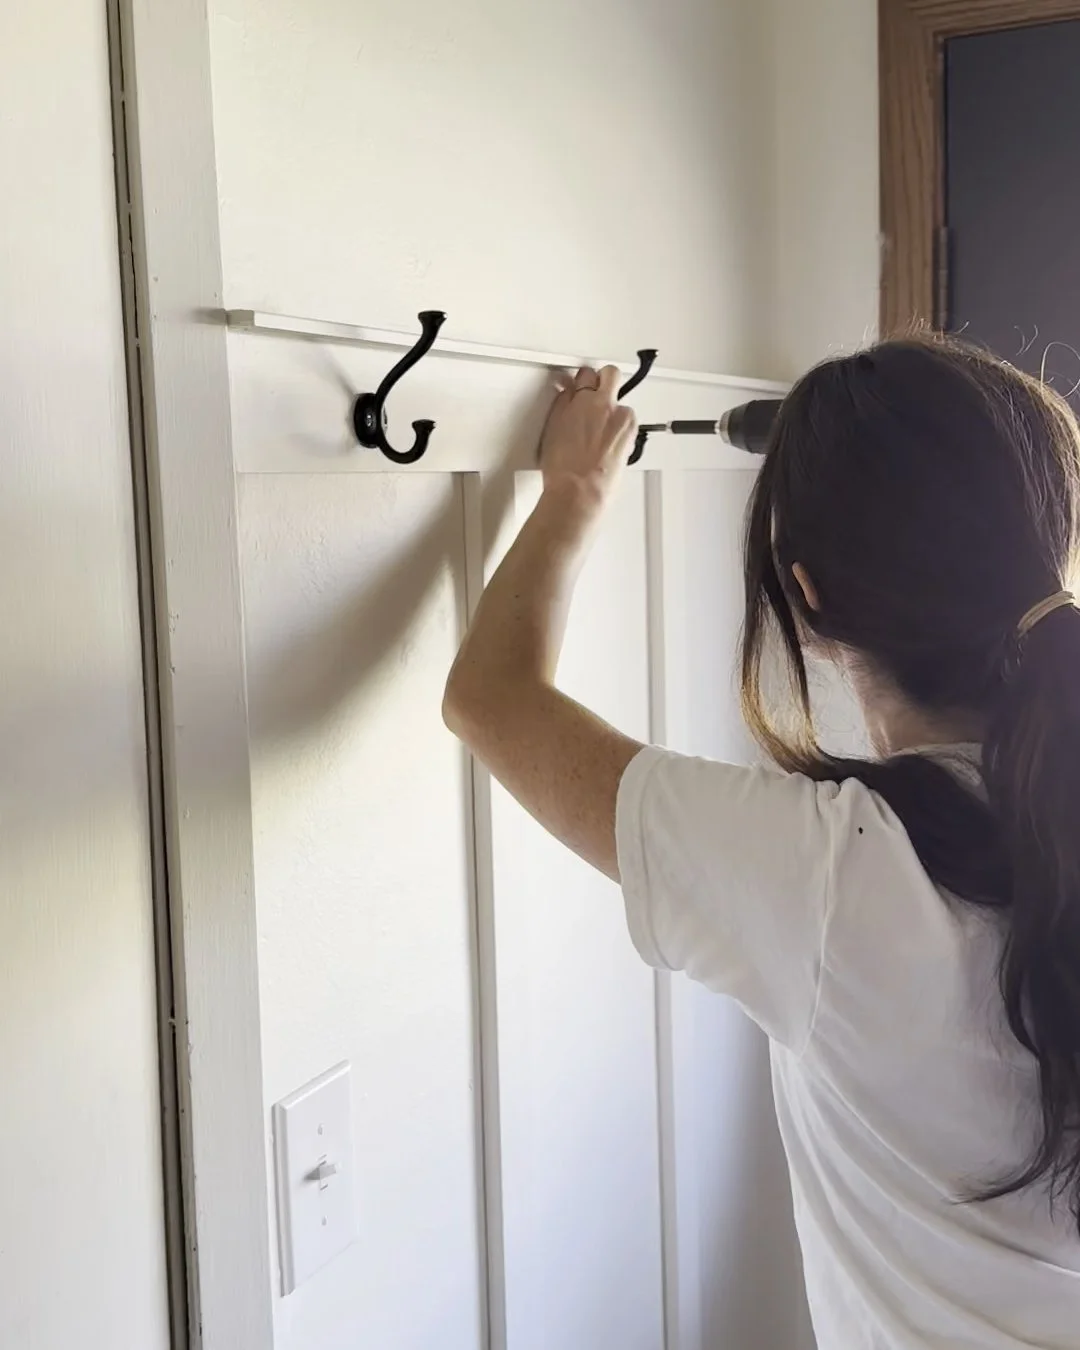
Step 4: Add Coat Hooks
Once the paint is dry:
Mark equal spacing along the top board (I space equally between the vertical battens).
Pre-drill small holes, then screw in your hooks.
For extra strength, make sure some hooks line up with wall studs or use anchors.
Hooks are great for coats, bags, or hats and instantly make your entryway more functional! I use these hooks.
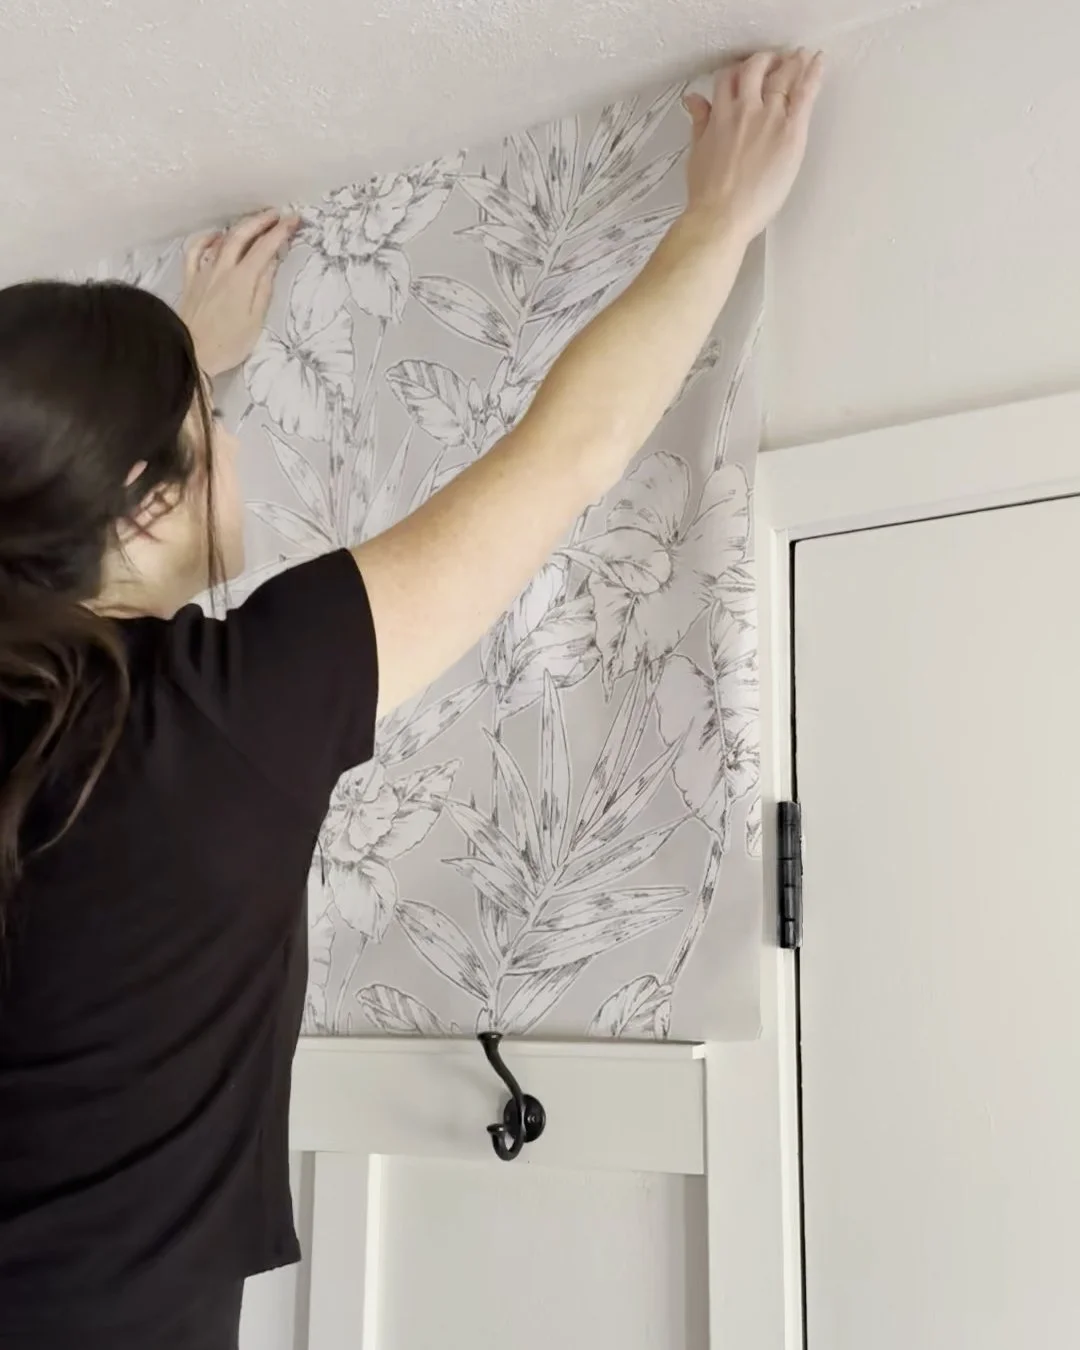
Step 5: Add Wallpaper
If you want extra style above the board and batten:
Apply wallpaper above the top trim board.
Use a bold pattern or subtle texture for contrast.
Smooth out air bubbles and trim edges neatly along the top board for a crisp finish.
This combo—paint + wallpaper + hooks—makes the space look custom and designer-level. I use this peel-and-stick wallpaper.
Finish the Look


This content may contain affiliate links. I earn a small amount from each purchase.